


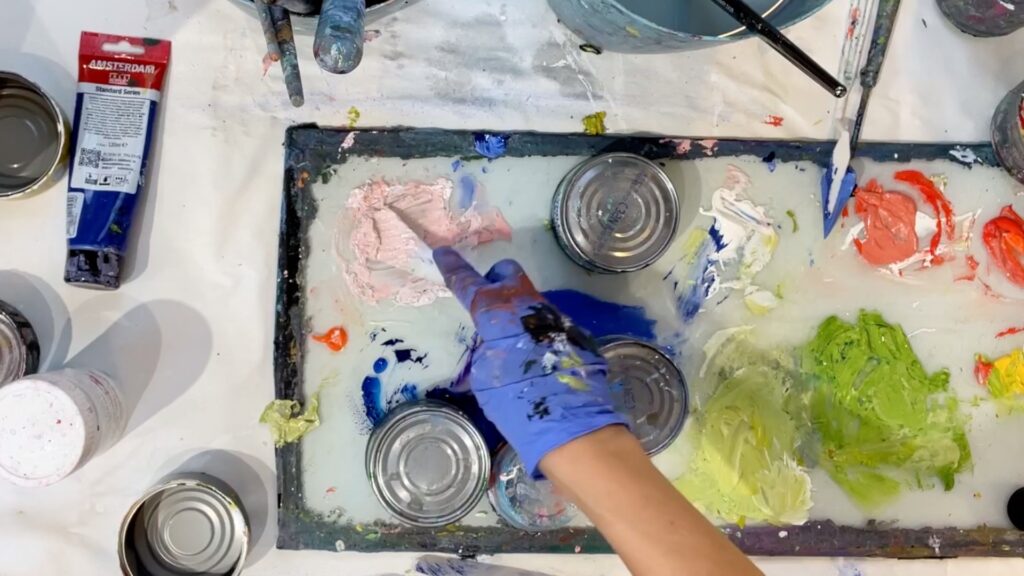
Every artist has a preferred palette, and there are many options available: wet-palettes, plastic, disposable paper, paper plates, and glass. If you paint with acrylics or oil, consider using a glass palette. Glass palettes are one of the best palettes for oil and acrylic painting. They are customizable, ideal for color mixing with their white background, easy to clean, and can last for years with proper care. In this guide, I’ll show you how to make your very own glass palette.
Supplies Needed: Piece of glass, cardboard to fit glass, duct tape, utility knife, scissors, paint brush, gesso.
Prefer to watch a tutorial? Check it out here:
Step 1: Determine the Size of Your Palette
The first step is to decide on the size of your palette. Consider the type of work you do and the size of your workspace. I recommend a palette no smaller than 6” x 12”. My favorite palette size is 12” x 28”, which provides ample space for mixing colors without feeling cramped. Once you have your measurements, head to an auto glass store to get the glass cut to your specified dimensions.
Step 2: Visit an Auto Glass Store to Get Your Glass Piece Cut
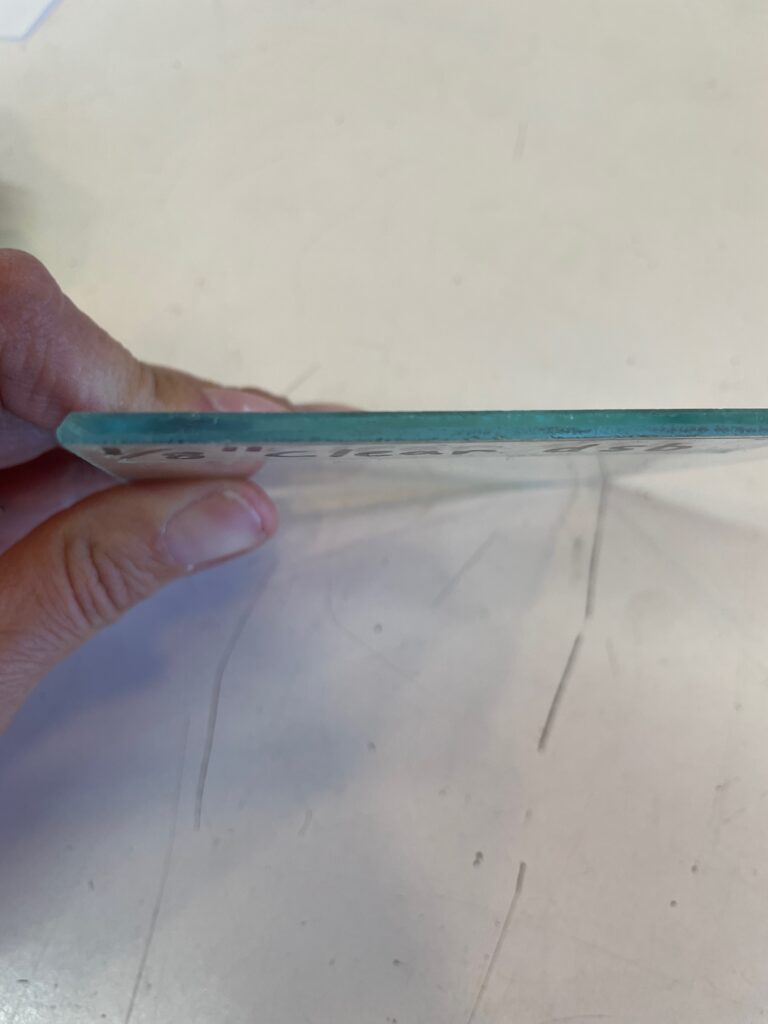
At the glass store, you’ll find several thicknesses. For a palette, a thickness of about 1/8 inch is ideal. This thickness is sturdy enough for regular use without being too heavy. You can also opt to purchase tempered glass (smoothed edges), but it will be more expensive. All of my palettes were made with un-tempered (DSB) glass, and I never had an issue. The 12″ x 20″ piece I demonstrate in this tutorial costed me $20.
Step 3: Prepare the Glass & Cardboard Base
Safety first: when handling glass, always wear gloves and be very careful, as the edges can be very sharp!
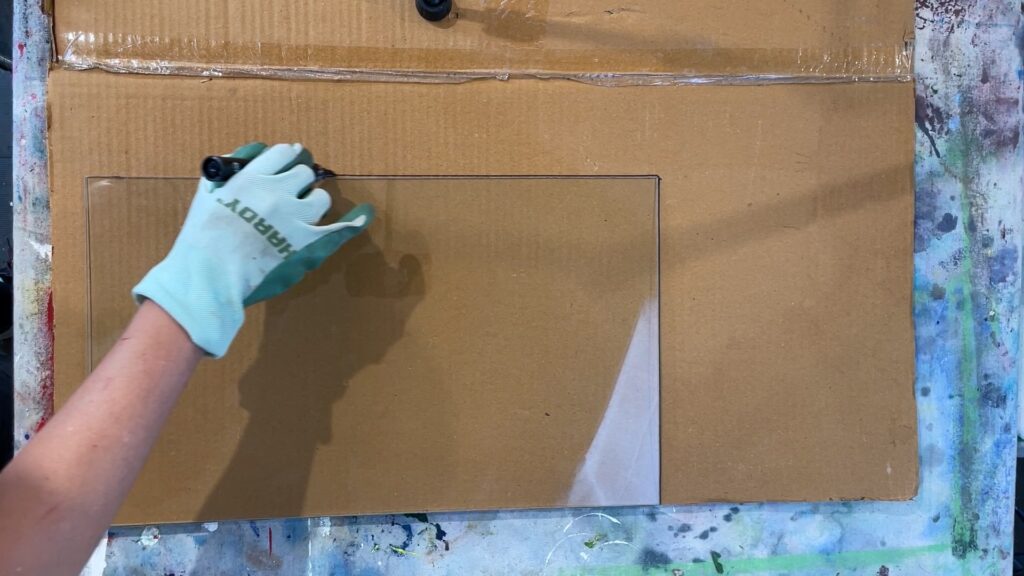
First, clean both sides of the glass with window cleaner, or rubbing alcohol for stubborn areas. Lay the glass palette on a piece of cardboard, and then use a black marker to outline the palette. Carefully set the glass aside and cut the cardboard with a metal ruler along the outline with a sharp utility knife. Remember to never cut towards yourself and to protect the surface you’re cutting on.
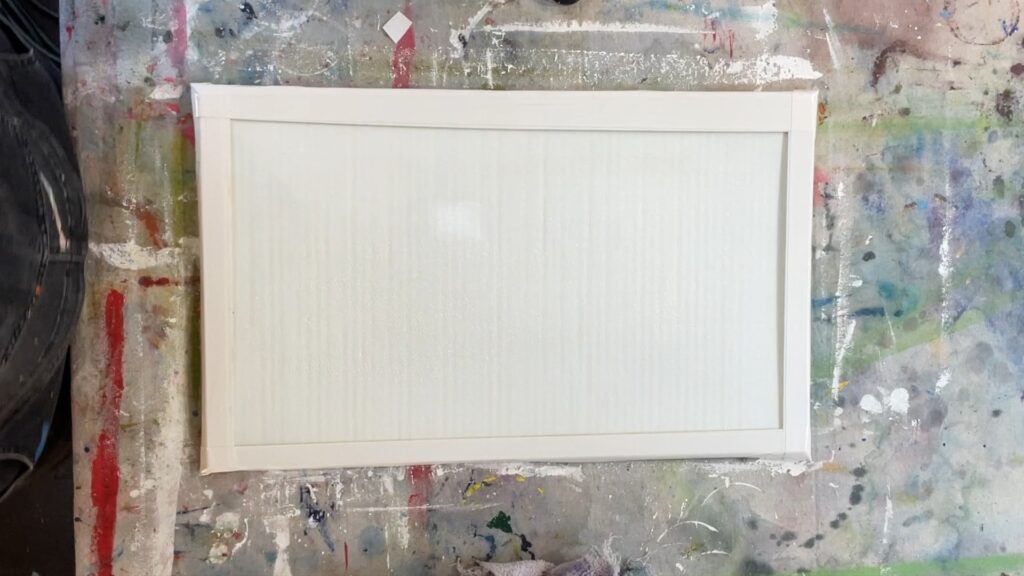
Step 4: Apply Gesso to the Cardboard
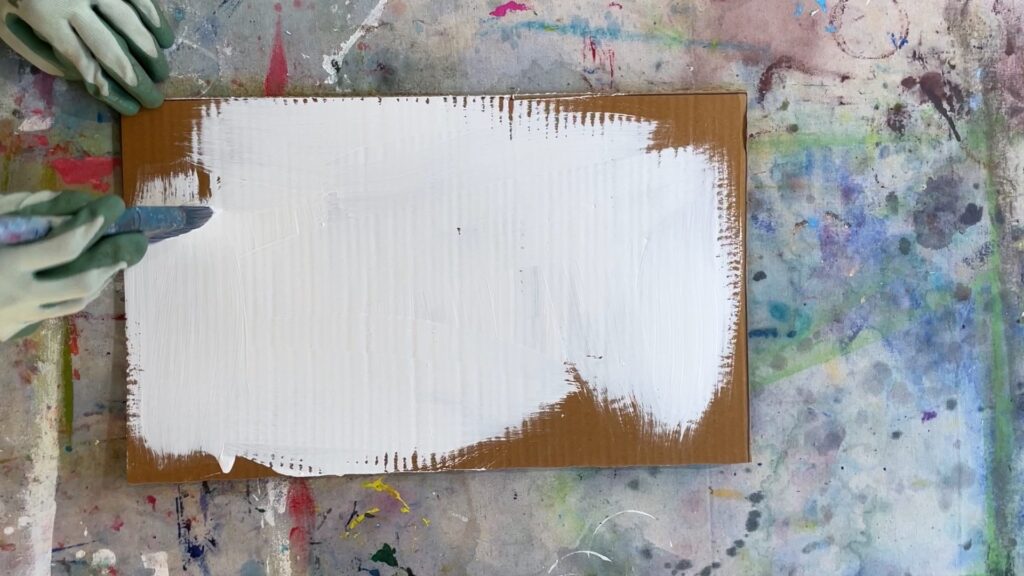
After cutting out the cardboard, apply gesso. All you NEED is one coat on the side you will be color-mixing on, but I recommend two coats and a coat on the back side. This provides protection for the cardboard, especially when it gets wet. You could also spray a clear coat on the back instead, though I did not gesso the back of the palette I have used for 20 years, and it’s been fine. Regardless of what you choose, ensure the cardboard dries completely before moving to the next step.
Step 5: Attach the Cardboard to the Glass Palette
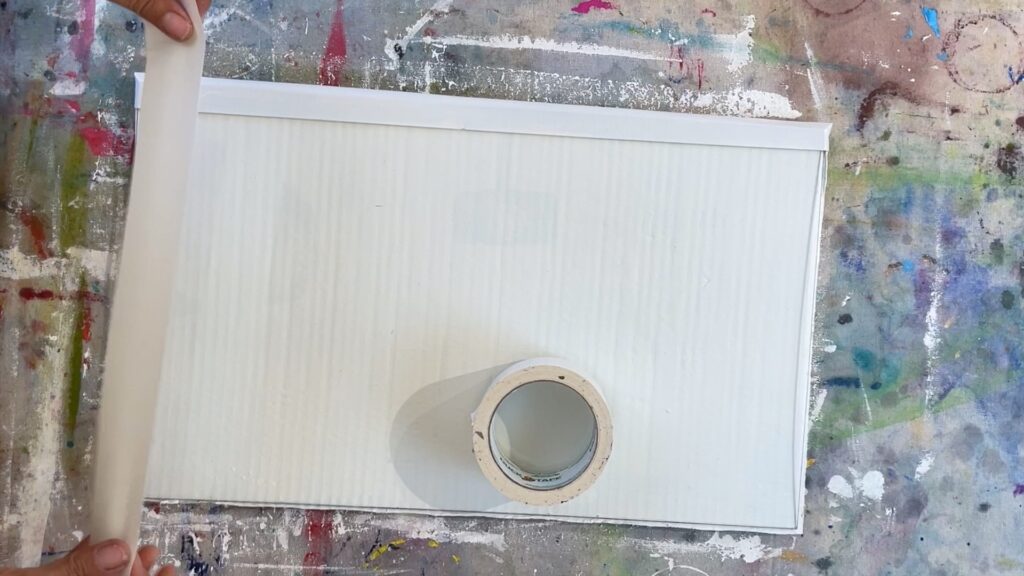
Next, carefully tape the cardboard and glass together using duct tape around the edges of the cardboard. Apply 2-3 layers of duct tape to protect any sharp edges, particularly the corners. This not only secures the cardboard to the glass but also creates a solid, durable palette.
That’s all it takes to make your own palette. Read on to learn how to use, clean and store your new glass palette.
Best Practices for Using, Cleaning, and Storing Your Glass Palette
Keeping Paints Wet
While working on your glass palette, you can use an old tuna fish can, cat food can, or small plastic container to cover your mixed paint. This keeps your paint wet during your session. If you need to leave paint overnight, spritz it with water before covering it with the container. This method can keep large globs of paint wet for days.
Clean Up
To clean your palette, wipe with a wet paper towel or rag (rag dipped in turpentine for oil paint). Use a palette knife to scrape away dried paint. After removing the paint, spray the palette with water and wipe it clean with a wet rag. For a thorough cleaning of acrylic paint, spray again with rubbing alcohol, let sit for 30 seconds, and use a wet rag to remove any residual paint.
Storage
Store your glass palette carefully to prevent it from breaking. Keep it flat on your art table or lean it against a wall where it won’t get knocked over. If you have enough space, a dedicated slot or drawer can offer additional protection.
Conclusion
A glass palette can significantly enhance your painting experience by providing a large, easy-to-clean surface for mixing colors. These palettes are durable and can last for many years with proper care—I’ve had mine for over 20 years. The white background of the glass palette helps you achieve true color mixes, making your artwork more vibrant and accurate.
Making your own glass palette is a simple, rewarding project that not only saves you money but also gives you a high-quality tool tailored to your specific needs. Follow these steps to craft your custom glass palette and enjoy the benefits it brings to your painting practice. Happy painting! If you make one and love it, leave a comment below!
ABOUT ANDREA CERMANSKI
I am an artist out of Santa Fe, New Mexico who has been painting for almost 30 years. I love to teach first-timers as well as experienced painters who need a creative reboot. My work has been displayed in several galleries around the country, and I have a Bachelor’s in Art History, a Master’s in Art Education, and had my work in a show juried by Judy Chicago. The idea of getting more people painting makes me light up as I want to inspire more people to express their creative selves and tap into a place of joy and calm.
WANT TO LEARN MORE?
- Subscribe and get one of the FREEBIES below!
- PDF explaining How to Use My 5 Favorite Mediums
- Take the Quiz: What Abstract Artist are you Destined to Be?
- 8 Colors Every Artist Should Have: My list of BEST colors to buy and pro mixing tips
- Check out My Online Abstract Painting Course
- Read More Painting Tips Blog Posts
- Check out My Paintings & Art Prints for Sale
- Follow Me On YouTube, Instagram, or Pinterest

Brilliant! I wish I’d thought of it a long time ago.
Thank you!
You are welcome! This palette is a gamer changer!
Can you use any glass, like from an old frame? And can you use paint if you don’t have gesso?
Lisa, my only concern about that is the glass from a frame is thin. So make sure to have a thick piece of cardboard behind it. And white acrylic or even house paint will do it!