

How to Get Started with Acrylic Painting
If you want to learn how to start acrylic painting, you have come to the right place! I started out as an oil painter, but once I learned how to use acrylic, I made the switch and have never gone back! Don’t get me wrong: oil painting has its place, but for several reasons I have chosen to focus on acrylic. First, I will address the differences between oil and acrylic paint, and then I will discuss how to set up a work space, what tools you need, and how to start an acrylic painting. Consider this Beginner’s Guide to Acrylic Painting your How to Paint 101 crash course!
Acrylic vs Oil Painting
What is the difference between acrylic and oil painting? Here are the basics:
1. Composition of the Paint
Oil paint is made of pigment ground together with oils, usually linseed oil. Acrylic is made of pigment and an acrylic binder called acrylic polymer (plastic).
2. Dry Time
Oil paint takes longer to dry–depending on the color, anywhere between several hours to several days! Depending on humidity, acrylic takes a much shorter time to dry at about 20-30 minutes. Therefore, oil paint is easier to blend because the colors stay wet for so long, and with acrylic you would need to use a retarder or water to keep your mix wet for blending.
3. Solvents Needed
Oil paint requires a solvent such as turpentine in order to clean, and this is the most toxic part of painting with oils. You can purchase less toxic solvents such as Gamsol, but be careful of buying odorless paint thinner as these are still full of harmful chemicals, you just can’t smell them as much. Acrylic, on the other hand, just needs water for clean-up.
4. Cost
Oil paint is more expensive, but a little bit goes a long way. Acrylics are cheaper, and you can get very high quality acrylics with a high pigment load such as Golden.
5. Shelf Life
The oils in oil paint preserve them, so they have a very long shelf life. I have oil paints from 20 years ago that are still usable! A well-sealed acrylic should last quite a few years, but I have had acrylics that dried up after 5 years. Always seal them well and you should be ok.
What is the Best Paint for Beginners?
A beginner should use any paint they feel drawn to. However, due to the cheaper cost, fast dry time and ease of clean-up, I think acrylic is a great place to start for a beginner. There are many different brands, and to start I would recommend Blick paint or Amsterdam. I find them both to be well-priced for the quality. You can get cheaper paint, but it might rub off with water, even when dry. Also, the pigment loads will be low.
What Colors to Purchase for Color Mixing
Here are the basic colors I recommend for color mixing. I always keep these in the studio because you can mix a multitude of colors with these alone:
White: Titanium White
Black: Mars or Ivory Black
Red: Cadmium Red Medium (you can get Cadmium Red Light too, but get medium if you only get one)
Yellow: Cadmium Yellow Medium
Blue: Phthalo Blue
Green: Phthalo Green
Organge: Cadmium Orange
Purple: Dioxazine Purple
Neutrals: Burnt Umber, Raw Sienna
Other Colors That are Good to Have on Hand
Cream: Titanium Buff or Raw Titanium
Gray: Payne’s Gray
Quinacridone Magenta
Alizarin Crimson
Cerrulean Blue
Ultramarine Blue
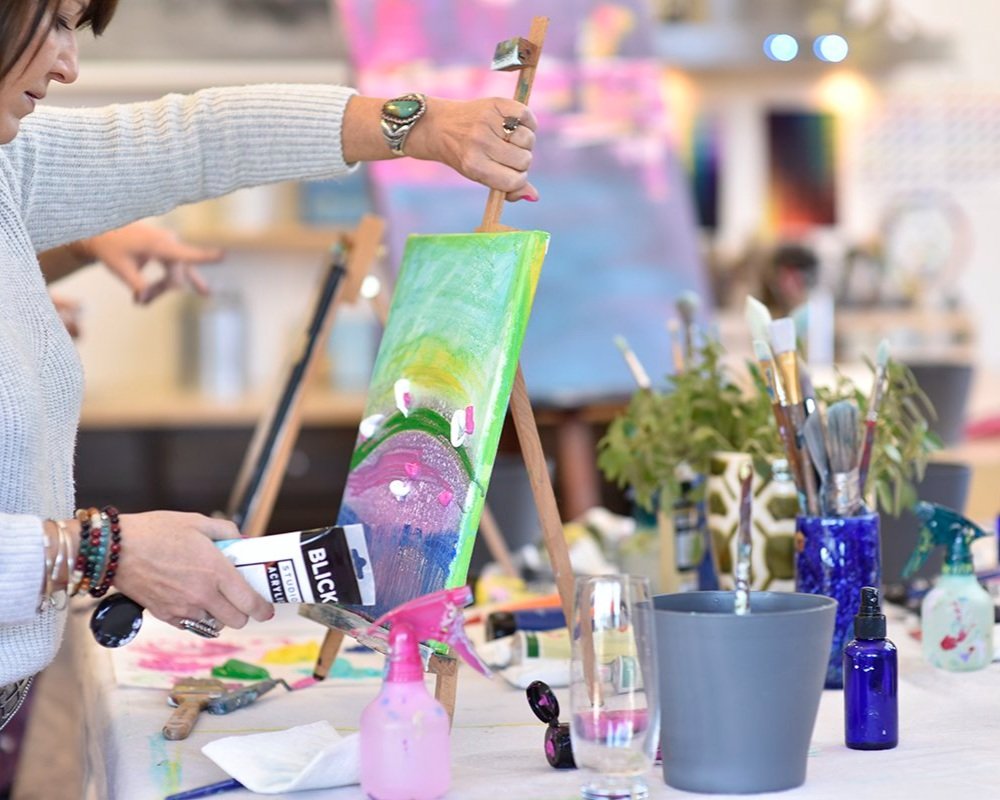
Tools Needed to do Acrylic Painting
-
Brushes (preferably some rounds and flats)
-
Container of water
-
Palette knife or plastic knife to mix paint
-
A palette on which you can mix your paints
-
Canvas, panel, paper or other painting surface.
I have a blog post that goes into a lot more detail about each of the supplies above as well as recommended brands, so check it out if you want to go a bit deeper on the subject: Ultimate Guide to the BEST Acrylic Painting Tools

Acrylic painting is easy once you figure out your set up.
How to Set Up an Area for Painting
All you need is a small part of a table on which to paint. You can put your canvas or paper on the table, or you can use an easel. Unless you don’t care about the table, I would recommend covering it with plastic drop cloth and then cotton drop cloth on top of that. This protects your table from spills that can go right through the cotton cloth and ruin your table. You might also put plastic or cotton drop cloth under your chair where you are standing to protect the floor.
How to Start a Painting: Step by Step Instructions
-
If your canvas, paper or panel is ungessoed, add 2 layers of gesso. You should paint gesso on in one direction with a large flat brush, let it dry, and then paint another coat in the opposing direction (your brush strokes should be perpendicular to eachother for the 2nd coat). Even if your canvas is gessoed, some artists like to add another coat or two to cover over the “factory” gesso coat. Let dry all the way through.
-
Paint a layer of paint, or a “ground” color, on the entire piece, including the sides. You can do any color you want for abstraction. For landscapes, you might consider colors such as neutral gray, raw or burnt sienna, yellow ocher, or burnt umber. Let it dry completely. Don’t ever start on a blank canvas!
-
Decide on the composition. There are several different types of composition, but here are a few popular ones.
-
Central composition puts the focal point of the painting in the center of the piece.
-
Low horizon line composition puts your horizon line in the lower third. I call this big sky because if you were doing a landscape painting you would put your effort into the sky while the land you would play a lessor role.
-
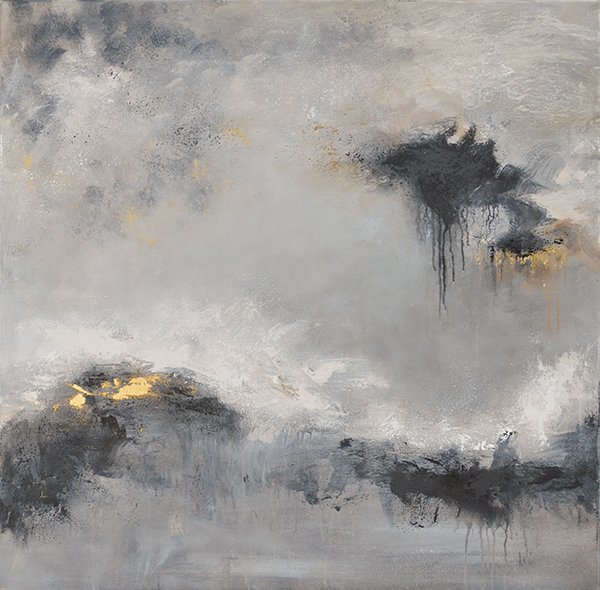
Painting with Low Horizon Line by Andrea Cermanski
4. With a paint brush or charcoal, roughly sketch out your painting’s composition. I usually use paint for this, but if you want to commit less, charcoal is fine. Just keep in mind the charcoal will mix with your paint colors and change them! If you are doing non-representational/abstract painting, stay open to the fact that your composition might change a lot. You have to start somewhere if you aren’t using a reference image, so choosing a strong composition type sets you up for a more successful painting.
5. Add details to your piece, making sure that you eventually have a clear focal point that the viewer’s eye is drawn to first. Try to keep a healthy balance of contrast in terms of value, color, types of brushstrokes, and thicknesses of lines. Start with thin layers of paint, and then go thicker with the paint as you get closer to finishing. Consider using acrylic mediums to create a variety of sheens, thicknesses and textures in your paint. If you want to know more about mediums (my secret weapon!), I have a FREE PDF I offer to subscribers of my email list on the 5 Acrylic Mediums Every Artist Should Have. Subscribe to get a copy!
6. As you work on your piece, keep flipping it in different directions so that you can see it in fresh ways. Often things that need work will stand out more when you change your perspective, so I highly recommend doing this.
7. When do you know when it’s done? Sometimes I gasp and feel a sense of sudden awe after completing a finishing brush stroke. That’s when I definitely know it’s done. But other things you can do is a visual check for contrast, balance, a strong focal point, etc. You can also look at the painting in the mirror to refresh your perspective. Finally, get feedback from someone you trust, or post it on a Facebook painting group. Tag me on the post if you want my feedback–I’m always willing to give my opinion!
Conclusion
In conclusion, acrylic paint is probably easier for most beginner painters due to its fast dry time, lower cost, and ability to clean with water. To start a painting, you need a workspace, a painting surface, paints and some tools. Protect your workspace, and then always start your piece with a base color. Figure out your composition and sketch it onto the piece. Keep adding details to the piece until it feels finished.
I hope this step-by-step beginner’s guide to starting an acrylic painting was helpful. Feel free to leave comments or ask questions below.
ABOUT ANDREA CERMANSKI
I am an artist out of Santa Fe, New Mexico who has been painting for almost 30 years. I love to teach first-timers as well as experienced painters who need a creative reboot. My work has been displayed in several galleries around the country, and I have a Bachelor’s in Art History, a Master’s in Art Education, and had my work in a show juried by Judy Chicago. The idea of getting more people painting makes me light up as I want to inspire more people to express their creative selves and tap into a place of joy and calm.
WANT TO LEARN MORE?
- Subscribe and get one of the FREEBIES below!
- PDF explaining How to Use My 5 Favorite Mediums
- Take the Quiz: What Abstract Artist are you Destined to Be?
- 8 Colors Every Artist Should Have: My list of BEST colors to buy and pro mixing tips
- Check out My Online Abstract Painting Course
- Read More Painting Tips Blog Posts
- Check out My Paintings & Art Prints for Sale
- Follow Me On YouTube, Instagram, or Pinterest

Thank you as you continually guide and encourage me. Maybe someday you classes will be in my budget. In the meantime you have made my day giving more tips. Your very much appreciated.
You are very welcome, and I am glad you are feeling encouraged. Keep painting!
Thank you for sharing.
You are welcome, Lynette!
Thanks a lot for sharing these tips ma’am.These inforfamations are very helpful for beginners like me.Really wish to be a student of yours.
So glad they are helpful, Najuma!
Hi Andrea!
Great beginner tips in the blog! I appreciate your expertise! Elizabeth Music
I am so glad you are finding them helpful!